DrezSync books against your own Google Calendar. To let it do that, you connect your Google account once. It takes about ten minutes, and you only do it a single time.
Prefer not to do this yourself? We offer a done-for-you setup where we connect Google Calendar to your site for you. Otherwise, this guide covers the do-it-yourself path.
Before you start
- A Google account with the calendar you want to take bookings on
- Admin access to your WordPress site
- DrezSync installed and activated, alongside Gravity Forms
Keep this guide open in one tab and the Google Cloud Console in another.
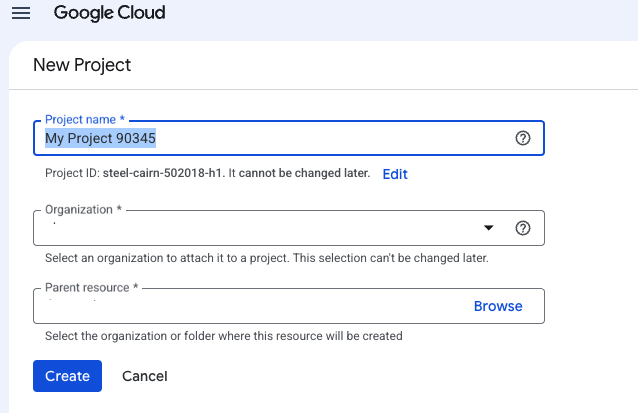
Part 1: Create a Google project
- Go to the Google Cloud Console and sign in.
- At the top, click the project dropdown, then New Project.
- Name it something you’ll recognize, like My Site Bookings, and click Create.
- Make sure that new project is selected in the top bar before you continue.
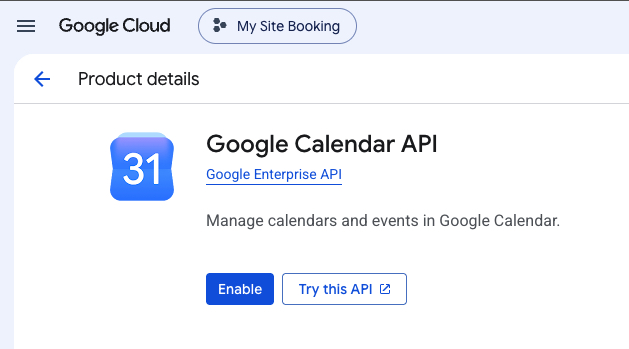
Part 2: Turn on the Calendar API
- In the left menu, go to APIs & Services > Library.
- Search for Google Calendar API and click it.
- Click Enable.
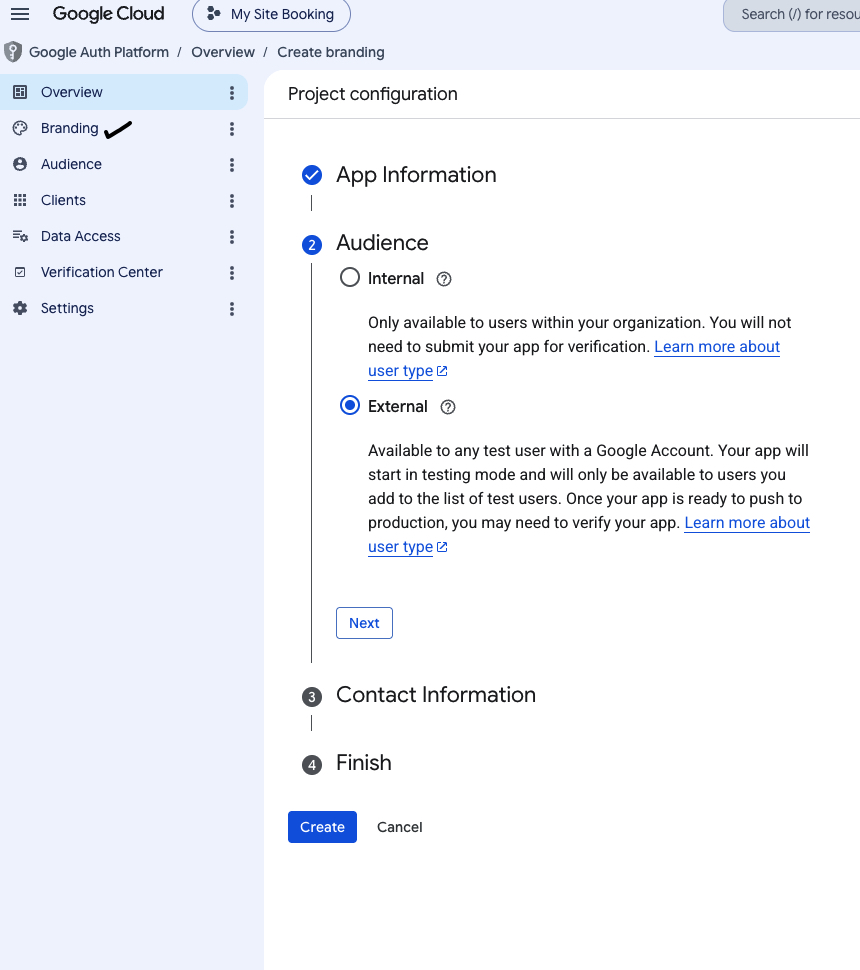
Part 3: Set up the consent screen
This is the permission screen your own account sees when connecting.
- Left menu: APIs & Services > OAuth consent screen >Google Auth Platform > Branding.
- Click Get started.
- App Information: App name plus your User support email. Next.
- Audience: choose External. Next.
- Contact Information: your email for Google’s notices. Next.
- Finish: agree to the User Data Policy, Continue, then Create.
Part 4: Keep the connection from expiring (important)
While your app is in “Testing” mode, Google expires the connection after 7 days, so your bookings would quietly stop syncing. To make it permanent:
- Back on the OAuth consent screen, find Publishing status.
- Click Publish app and confirm.
- Because you are using a calendar permission on your own account, Google may show an “unverified app” notice. For your own use this is completely fine, so you can proceed. Full verification only matters if you distribute the app to other people.
If you skip this step, you would have to reconnect DrezSync every week. Publishing avoids that.
Part 5: Create your credentials
- Go to Google Auth Platform > Clients and click Create client. (In older layouts this is APIs & Services > Credentials > Create credentials > OAuth client ID.)
- Set Application type to Web application.
- Under Authorized redirect URIs, click Add URI and paste the exact URL DrezSync shows on its settings screen (Forms > Settings > DrezSync, Step 1). It looks like this:
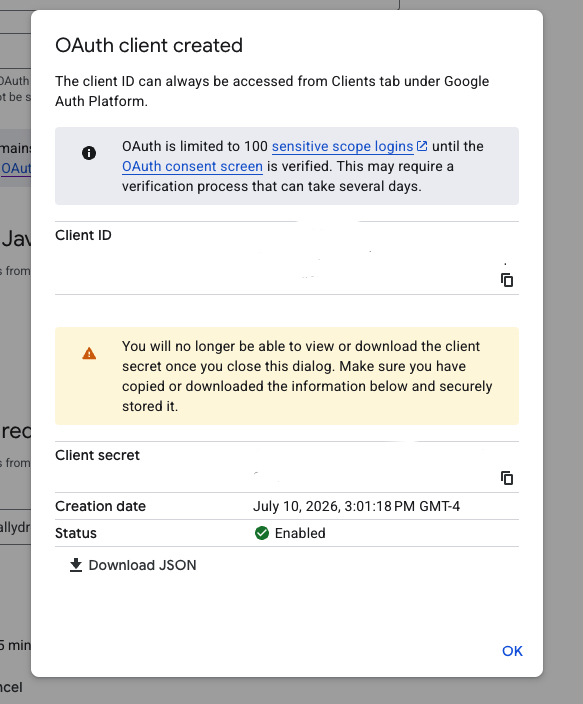
https://yoursite.com/wp-admin/admin-post.php?action=drezsync_oauth - Click Create. In the OAuth client created dialog, click Download JSON, then OK. That file holds your credentials. Save it somewhere safe, because Google will not show the client secret again after you close the dialog.
Part 6: Connect DrezSync
- In WordPress, go to Forms > Settings > DrezSync.
- Open the JSON file you downloaded, copy all of it, and paste it into the Step 2 box.
- Click Save credentials.
- Click Connect with Google and approve access. If you see the “unverified app” screen, click Advanced > Go to [your app] to continue.
- You will return to a screen that says Connected. Your form and calendar are now linked.
Your credentials are stored encrypted in your site’s database, never in a file that can be reached from the web.
Part 7: Find your Calendar ID
When you build a booking form, you will paste in a Calendar ID:
- In Google Calendar, hover the calendar you want, click the ⋮ menu, and choose Settings and sharing.
- Scroll to Integrate calendar and copy the Calendar ID.
Your main calendar’s ID is usually your email address.
Troubleshooting
- “redirect_uri_mismatch”: the redirect URI in Google must match the one DrezSync shows exactly, including
httpsand with no trailing slash. Copy and paste it. Do not type it. - “Access blocked” or “app isn’t verified”: click Advanced > Go to [your app] to continue. For a permanent fix, publish the app (Part 4).
- “Couldn’t reach Google Calendar” later on: the connection lapsed, often because of the 7-day testing limit. Reconnect, and publish the app if you have not.
- Nothing happens after Connect: make sure your Google account was added as a test user (Part 3), or that the app is published (Part 4).
Still stuck? Email support@allydrez.com.